
 👀 Choose SSD-powered VPS servers for increased speed, power, and security! Now 50% off- starting from only $3.19/mo.
This article provides a guide demonstrating how to manage two-factor authentication for Hosting Dashboard account.
How to Manage Two-Factor Authentication for Hosting Dashboard
To manage two-factor authentication for Hosting Dashboard, follow the steps below:
-
Enable Two-Factor Authentication
- Login to your Hosting Dashboard account.
- Navigate to the Security Settings in your Hosting Dashboard.
- Scroll down to Two-Factor Authentication and click the button to "Enable":
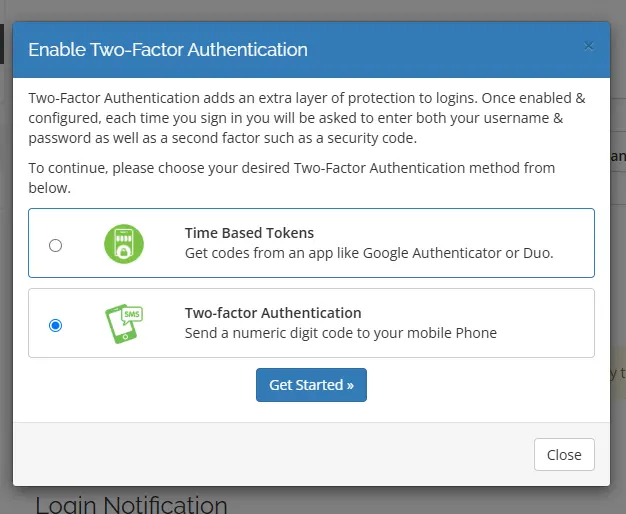
- Choose to use app like Google Authenticator or SMS message.
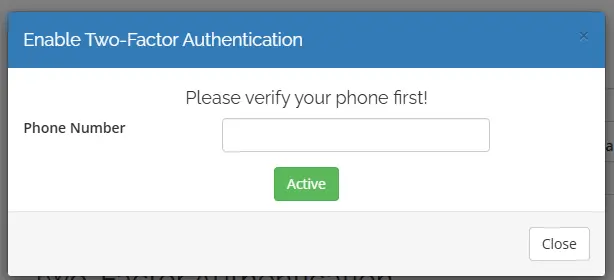
- To use SMS message, verify your phone number, by entering the number in the field, then clicking "Active":
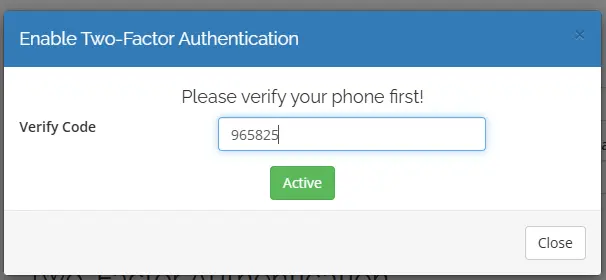
- Fill in the code sent to your phone, and click "Active"
- Save the Two-Factor Backup code, which you will need if you lose access to your phone.
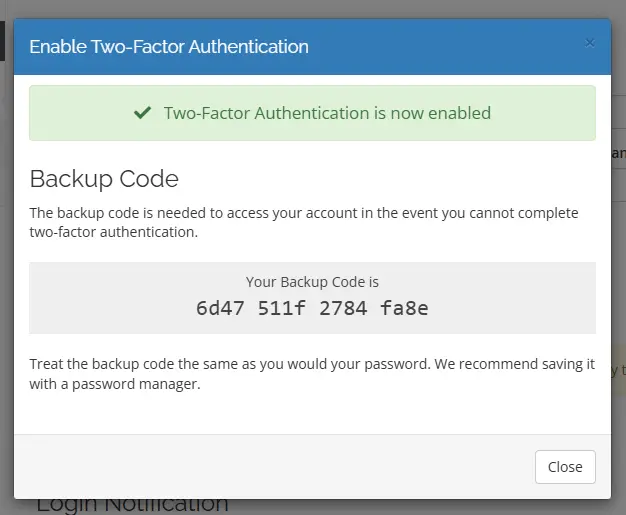
- That's it. Two-Factor Authentication is now enabled in your Hosting Dashboard.
-
Disable Two-Factor Authentication
- Login to your Hosting Dashboard account.
- Navigate to the Security Settings in your Hosting Dashboard.
- Scroll down to Two-Factor Authentication and click the button to "Disable":
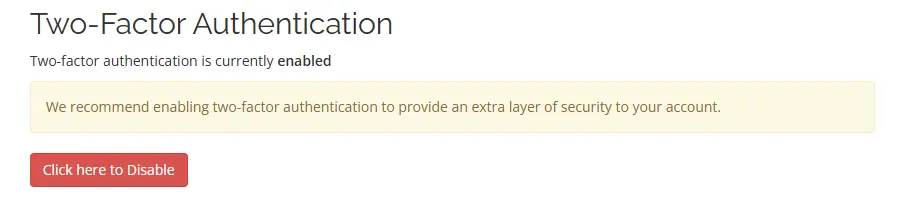
- Enter your password to confirm you would like to disable Two-Factor Authentication.
- That's it. Two-Factor Authentication is now disabled in your Hosting Dashboard.
Conclusion
You now know how to manage two-factor authentication for Hosting Dashboard account.