 👀 Choose SSD-powered VPS servers for increased speed, power, and security! Now 50% off- starting from only $3.19/mo.
This article discusses how to create an account in WHM. This guide requires Reseller or root-level server access.
How to Create an Account in WHM
To create an account in WHM, follow these steps:
- Login to your WHM account.
- Click on the "Account Functions" tab where you will find the options like "Create a New Account", "Skeleton Directory", "Terminate Accounts", "Limit Bandwidth Usage", etc.
- Click on "Create a New Account" to create a new account.
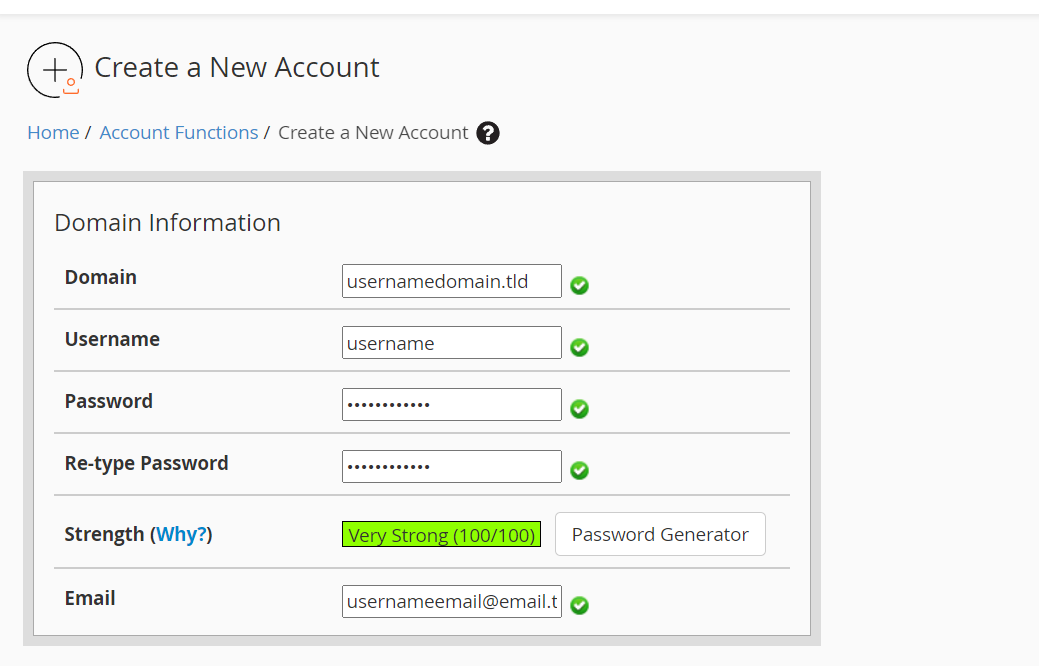
- Domain Information - Please fill all the details for creating a new account.
- Domain - Please enter the account's primary domain name (i.e. usernamedomain.tld). Must be a fully-qualified domain name.
- Username - WHM creates an username automatically, based on the first 8 characters of the domain name that is entered. You may either use this auto generated username or create a username of your own. (username cannot start with a number)
- Password - Choose a password for the new account (8 characters minimum, alphanumeric and should not contain the username), or utilize the Password Generator to create a highly secure password.
- Email - The email address for the account owner. This address will receive account and server-related updates from the WHM/cPanel server.
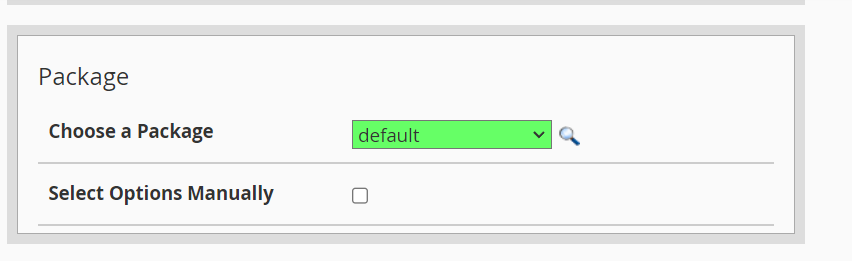
- Package - Here you will assign limits for the hosting account resources. You may set all the limits manually or select a preconfigured hosting plan that you have already created. By selecting the preconfigured plan/package, you can see that all the limits will be automatically set for the selected package.
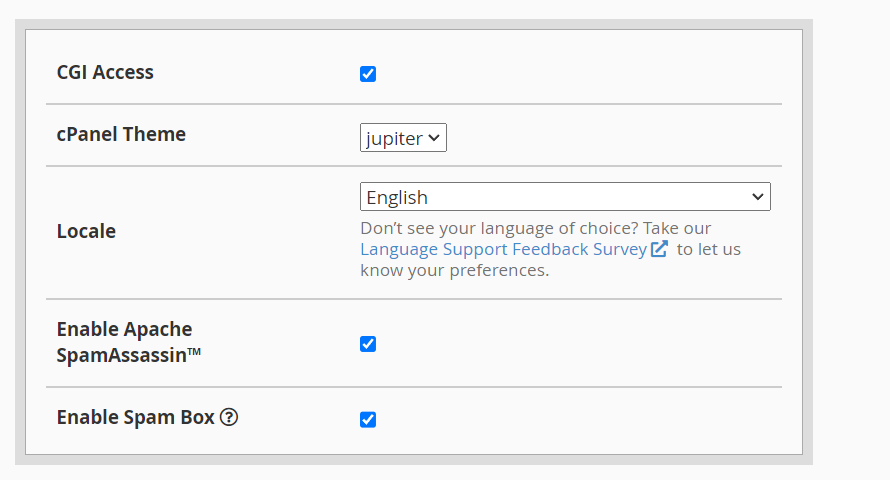
- Configure Account Settings - Configure additional account settings.
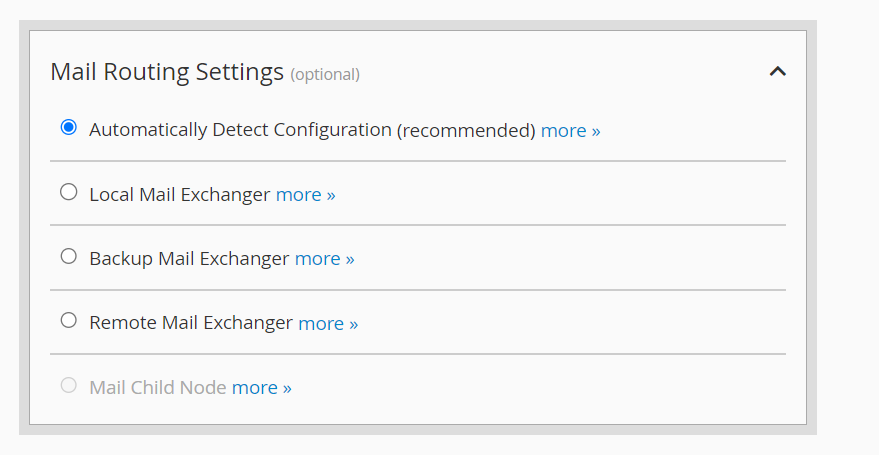
- Configure Mail Routing Settings - choose how this account's email will be routed. Available options are:
- Automatically Detect Configuration (recommended) -
- Local Mail Exchanger If the lowest numbered mail exchanger points to an IP address on this server, the server will be configured to accept mail locally and from outside the server.
- Backup Mail Exchanger If a mail exchanger that is not the lowest numbered mail exchanger points to an IP address on this server, the server will be configured to act as a backup mail exchanger.
- Remote Mail Exchanger If there are no mail exchangers that point to an IP address on this server, the server will not accept mail locally and will send mail to the lowest MX record.
- Local Mail Exchanger - Configure the server to always accept mail. Mail will be delivered locally on the server whenever it is sent from the server or outside the server.
- Backup Mail Exchanger - Configure the server as a backup mail exchanger. Mail will be held until a lower number mail exchanger is available.
- Remote Mail Exchanger - Configure the server to not accept mail locally and send mail to the lowest MX record.
- Automatically Detect Configuration (recommended) -
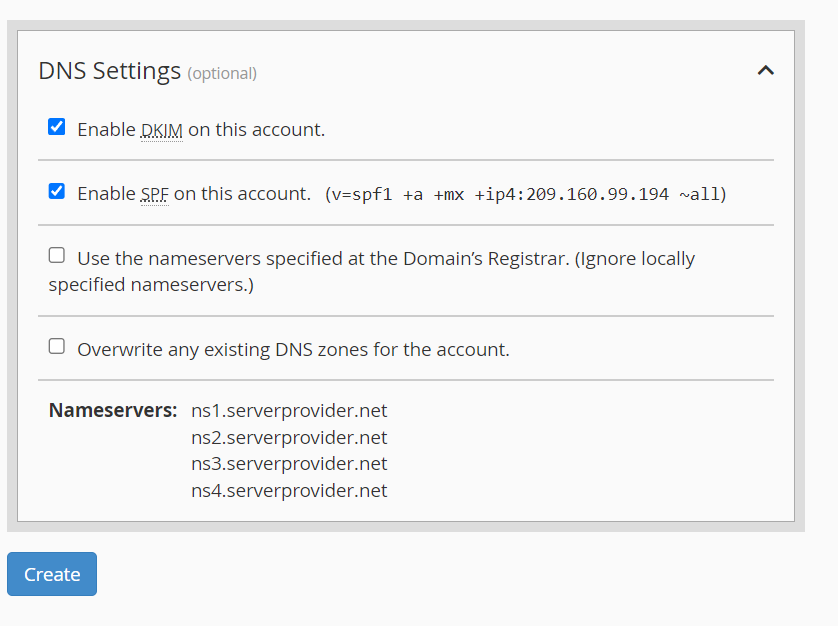
- Configure Account DNS Settings
- Click on the CREATE tab provided at the top of the page next to the RESET tab. Once you've clicked on the CREATE tab, you can see that the account has been successfully created.


If you are using the WHMCS billing software, a Welcome email can be generated and sent to the client with all of the required account credentials.
Conclusion
That's it. You now know how to create an account in WHM.
