 👀 Choose SSD-powered VPS servers for increased speed, power, and security! Now 50% off- starting from only $3.19/mo.
This article provides a guide for how to add a user to your Rad Web Hosting account.
Users have varying degrees of access to the account and it's assets (domains, hosting services, support tickets, and more), according to the steps and options made when a user account is added.
How to Add a User to Your Rad Web Hosting Account
To add a user to your Rad Web Hosting account, follow the steps provided below:
- Login to your Hosting Dashboard account.
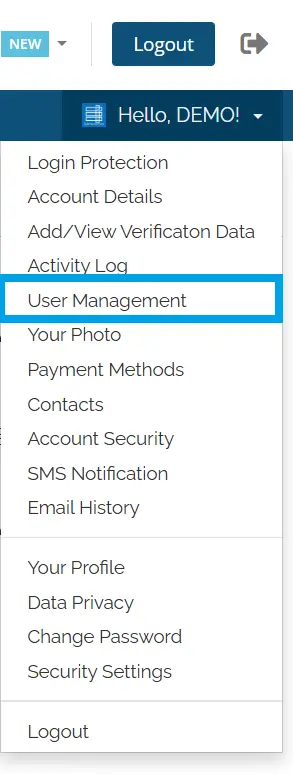
- Using the account menu, navigate to "User Management":
- From the User Management interface, scroll down to "Invite New User" and toggle the "Choose Permissions" radio to customize the access-level of the invitee:
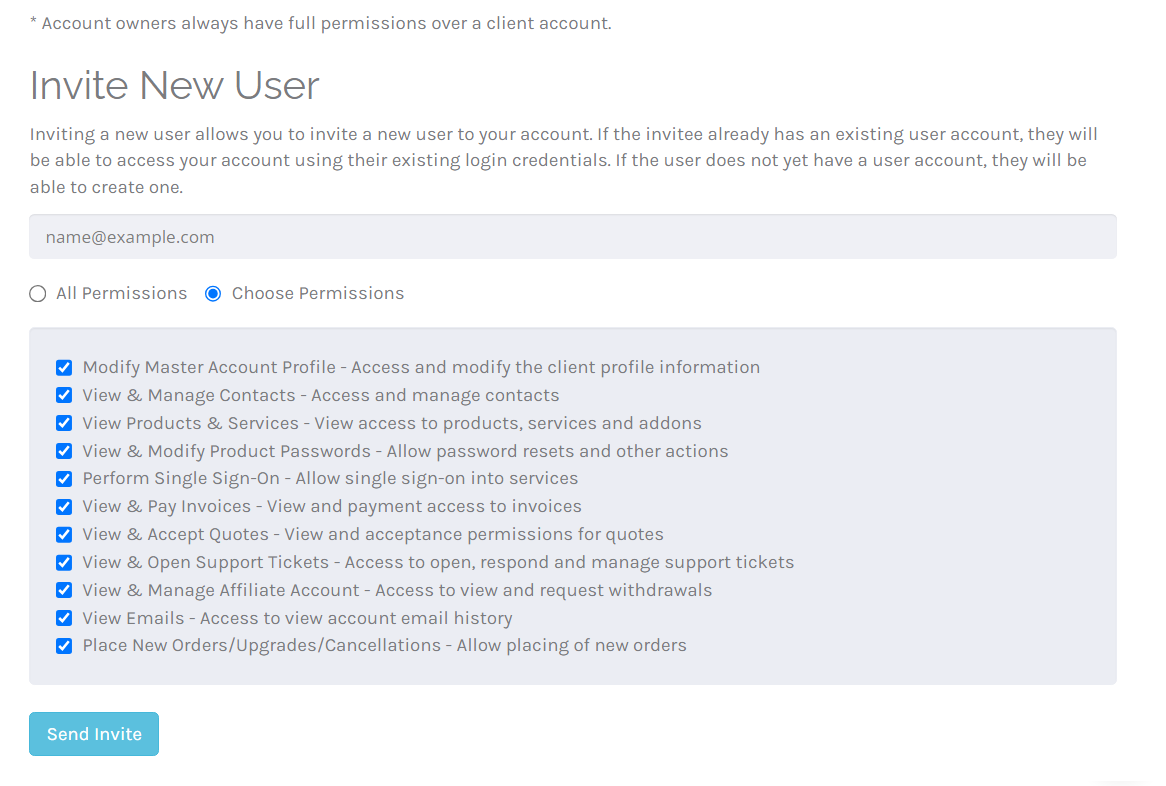
- Click "Send Invite" to send the invite to the email address.
- Once the user accepts the invite, they will automatically be added to the account with the permissions configured at invitation. User permissions can be modified at any time by the Master Account.


Conclusion
You now know how to add a user to your Rad Web Hosting account.
