How to Upgrade Your Hosting Plan


This article provides a guide for how to upgrade your hosting plan at Rad Web Hosting.

How to Upgrade Your Hosting Plan

To upgrade your hosting plan, follow the steps below:

  1. Login to the Hosting Dashboard
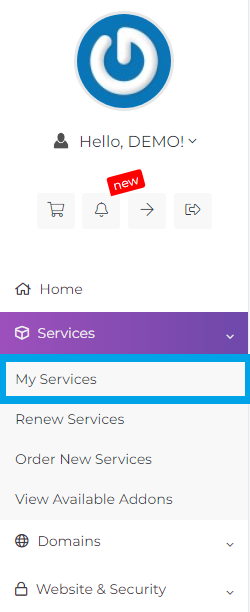
  2. Navigate to "My Services" tab
    Navigate to My Services
  3. Select the service to be upgraded.
  4. From the service management page, click "Upgrade/Downgrade"
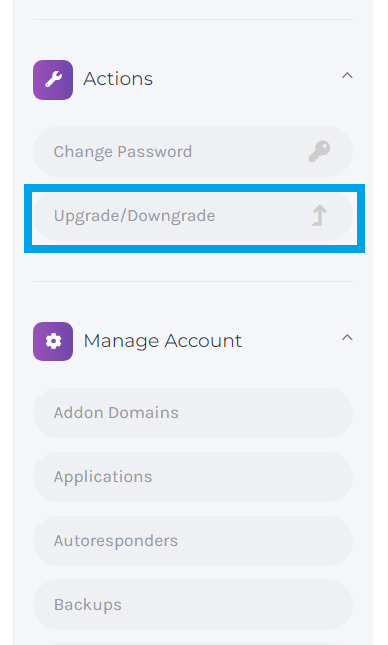
    Select Upgrade/Downgrade
  5. Select the service plan to upgrade to from the options listed under "New Configuration"
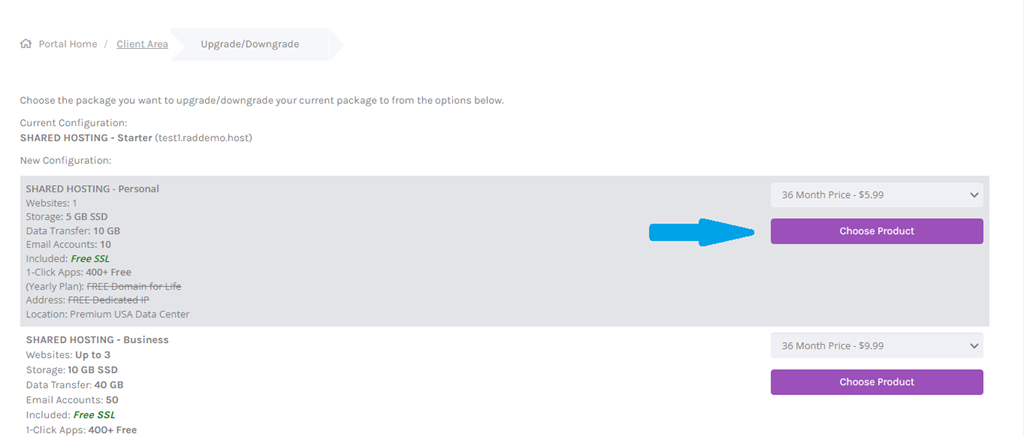
    Select New Configuration
  6. Complete the upgrade process by resolving any related invoice (if necessary).
  7. Your service will be upgraded automatically after payment confirmation.

For assistance, please open a support ticket.

Conclusion

You now know how to upgrade your hosting plan at Rad Web Hosting.

  • 1 Korisnici koji smatraju članak korisnim
Je li Vam ovaj odgovor pomogao?

Related Articles

Video: Change Primary Language in cPanel

This video tutorial provides Step-by-Step instructions for changing the Primary Language settings...

Submitting ARIN IP Justification Form

If you have recently ordered a dedicated server with greater than 16 IPs (equivalent to a /28...

Get Pushover Notifications for Web Hosting Account

This article will describe how to get Pushover Notifications for Rad Web Hosting updates to your...

Managed Support Guide

FREE Support for VPS and Dedicated servers Servers without a control panel: System reinstall...

How to Cancel a Stripe Subscription

This article provides a guide for how to cancel a Stripe subscription. How to Cancel a Stripe...