 👀 Choose SSD-powered VPS servers for increased speed, power, and security! Now 50% off- starting from only $3.19/mo.
This article provides a guide for server administrators who want to install cPanel on VPS server with VPS Panel.
What is cPanel?
cPanel and WHM are the two significant pieces of the cPanel server management interface, which provides a Web-based GUI for managing servers. Additionally, this alternative to command-line management increases the administration's overall visibility and control, enabling a more effective deployment of security processes and monitoring.
cPanel is an ideal solution for VPS hosting, significantly reducing complexity of command line management, and offering a host of enhancements for server administrators and website admins, alike.
cPanel System Requirements
To install cPanel on a CentOS VPS, the following conditions must be met:
- Designated fully-qualified domain name for the hostname (ex: server.yourdomain.com)
- Hostname must resolve to a public IPv4 or Ipv6 address
- Network Manager must be disabled
- Minimum hardware requirements: 1.1 GHz CPU, 1 GB RAM, 20 GB Disk
- Recommended minimum hardware: 1.1 GHz CPU, 2 GB RAM, 40 GB Disk
How to Install cPanel on VPS Server with VPS Panel
Follow the steps provided to install cPanel on a VPS using VPS Panel:
- Login to VPS Panel
- Navigate to "List VPS" (from side menu)
- Select the VPS that cPanel/WHM will be installed on
- View VPS information to verify server details
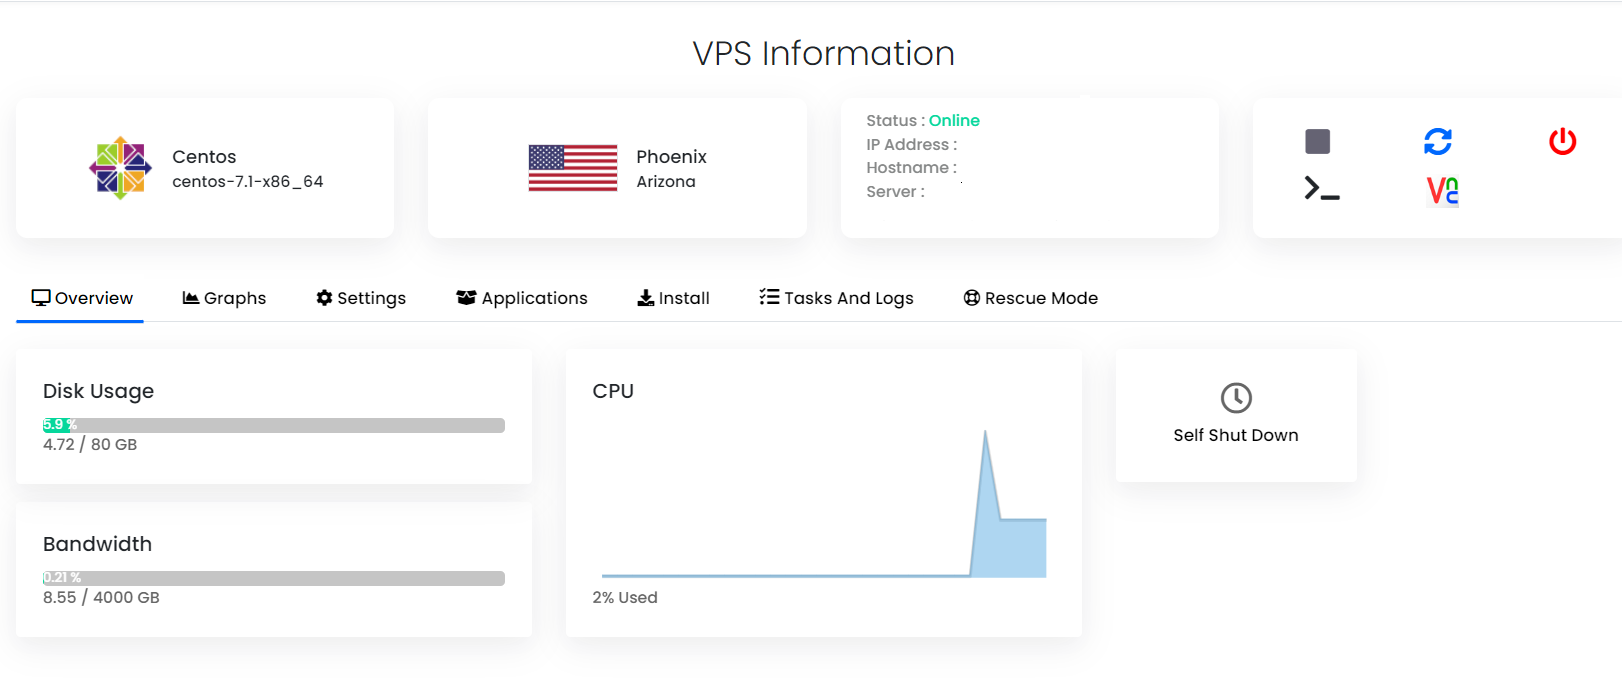
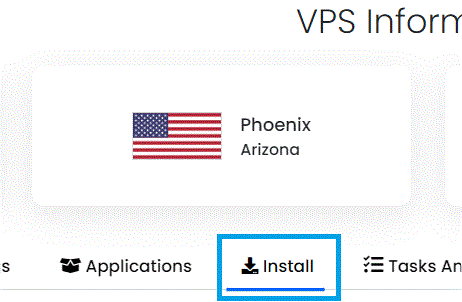
- Navigate to "Install" tab.
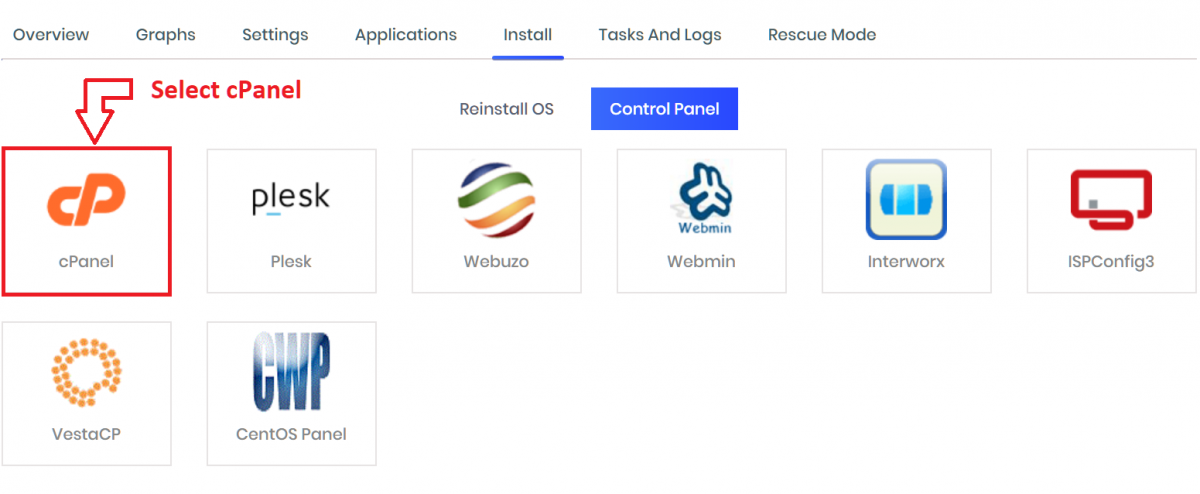
- Select cPanel from the "Control Panels" menu.
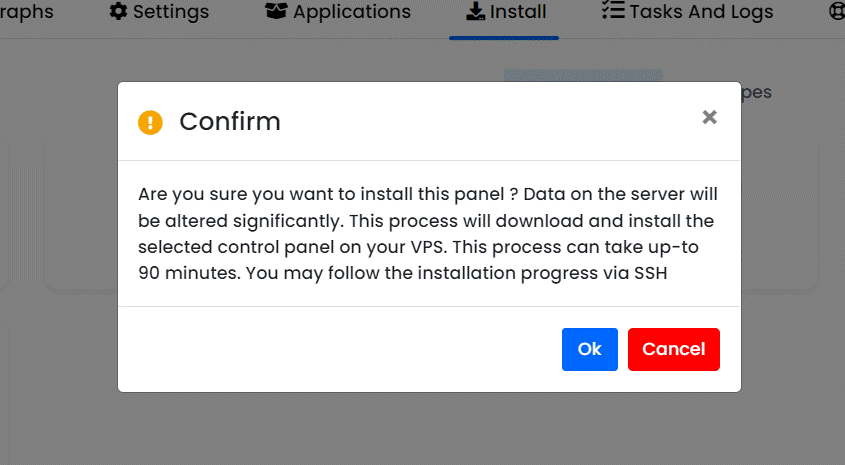
- Click to accept the data loss warning and start the automated cPanel installation.
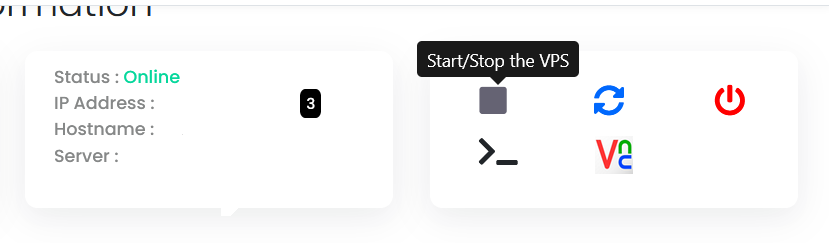
- Before the installation begins, you must shutdown the VPS by clicking the "STOP" icon, as shown in the image below:
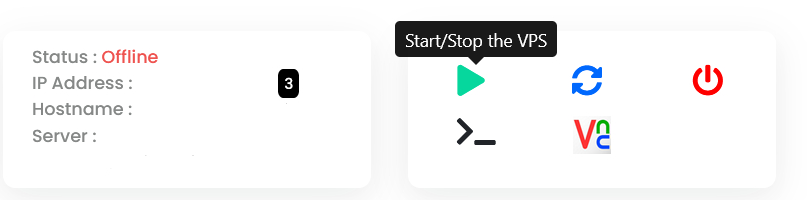
- Once the VPS has shutdown, click the "PLAY" icon to restart it, as shown below:
- When the VPS has booted, your installation will begin.
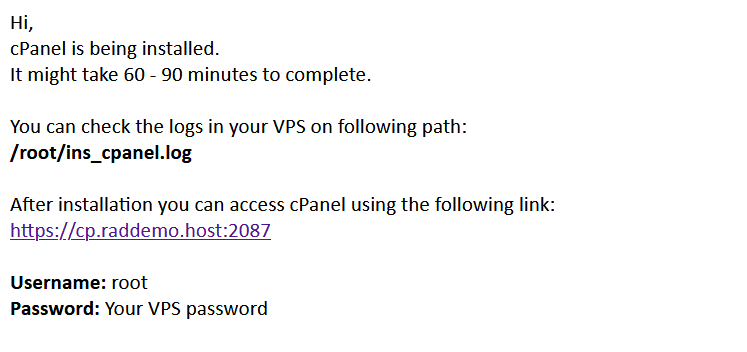
- An email with the control panel installation details will be sent.
- You may now navigate to the WHM login screen in your browser to configure the WHM settings.


The above guide assumes that a valid cPanel license has been generated for your server IP. A cPanel license may be ordered from the Rad Web Hosting Client Area.
