Use promo code FAST50 for 50% off SSD VPS servers!
This article provides a guide for server administrators who want to install InterWorx on VPS server with Virtualizor.
What is InterWorx?
The InterWorx Hosting Control Panel is a Linux web hosting control panel offering a plethora of features for both the system administrator and website owner. The panel also offers clustering in order to be able to expand beyond what the conventional stand-alone server can offer.
InterWorx Pricing
InterWorx is a commercial software requiring an active license key to function. License fees start from $7.50 USD/mo for VPS and $20.00 USD/mo for dedicated servers.
InterWorx System Requirements
To install InterWorx on a CentOS VPS, the following conditions must be met:
Minimum Hardware Requirements:
- Processor: 1.1 GHz.
- Disk Space: 20 GB minimum; 40 GB recommended.
- Memory: 1 GB minimum RAM with 3 GB minimum swap. If the system has more than 1 GB RAM, the RAM to swap ratio should be as follows: 2 GB RAM should have at least 4 GB swap. 4 GB - 8 GB RAM should have the same amount of swap as RAM.
Supported Operating Systems:
- RedHat Enterprise 7.x 64 bit Architecture
- CentOS 7.x 64 bit Architecture
- CloudLinux 7.x 64 bit Architecture
How to Install InterWorx on VPS Server with Virtualizor
Follow the steps provided to install InterWorx on a VPS using Virtualizor panel:
- Login to Virtualizor
- Navigate to "List VPS" (from side menu)
- Select the VPS that InterWorx will be installed on
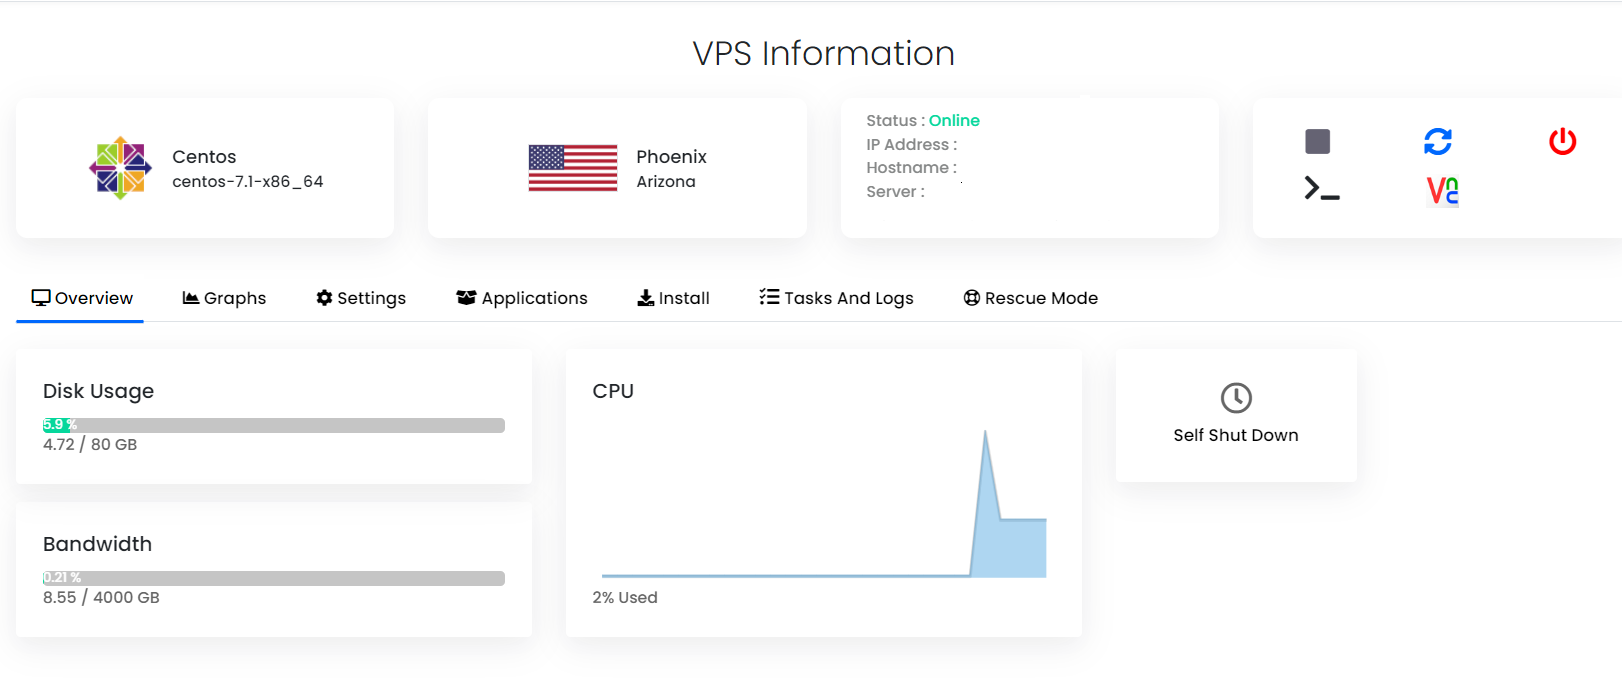
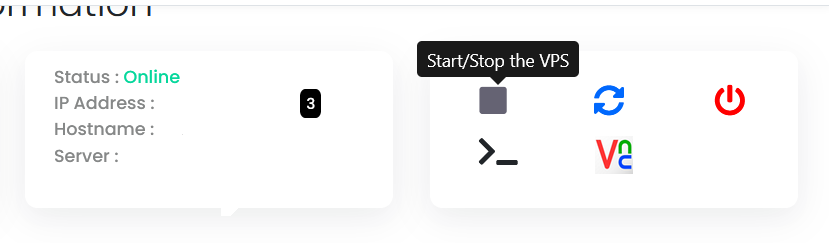
- View VPS information to verify server details
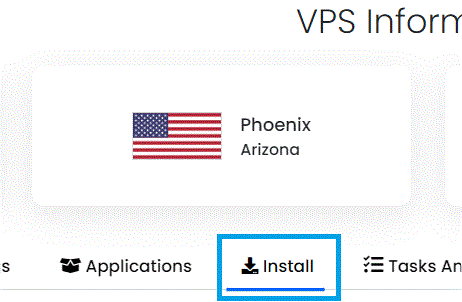
- Navigate to "Install" tab.
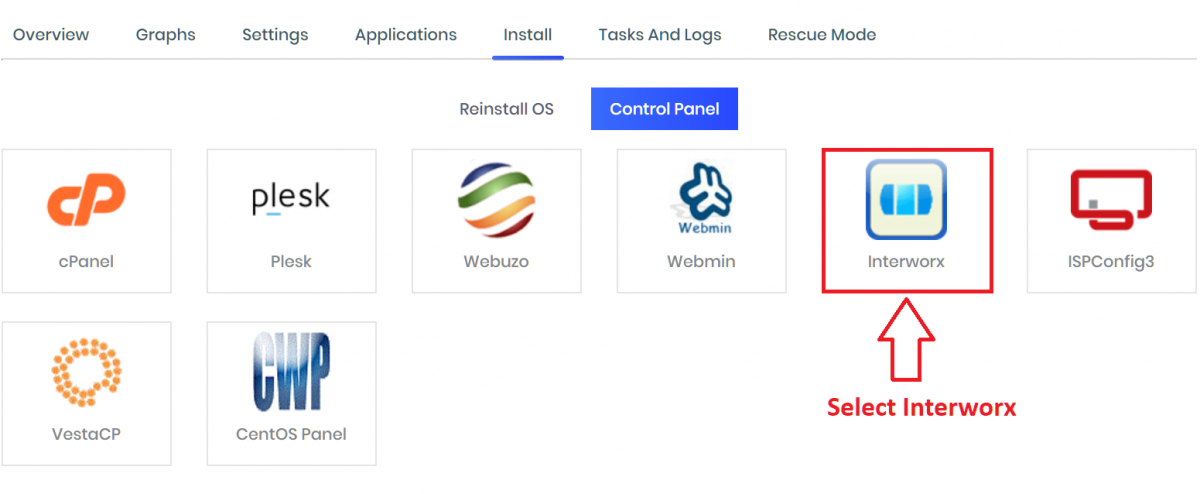
- Select InterWorx from the "Control Panels" menu.
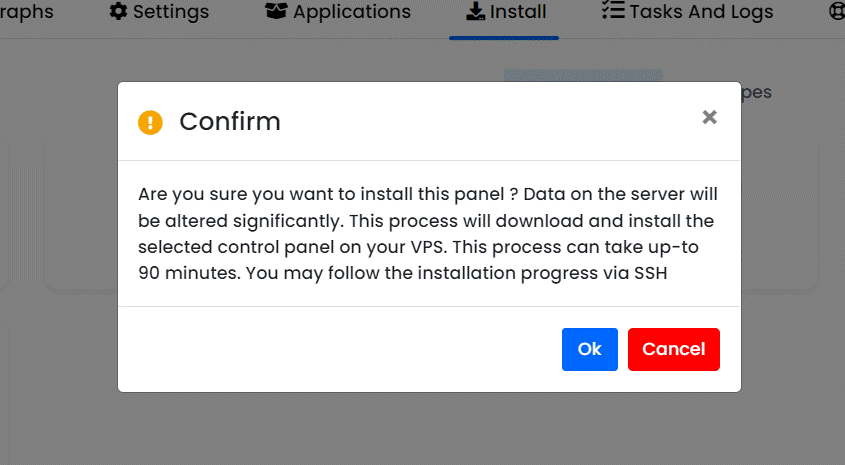
- Click to accept the data loss warning and start the automated InterWorx installation.
- Before the installation begins, you must shutdown the VPS by clicking the "STOP" icon, as shown in the image below:
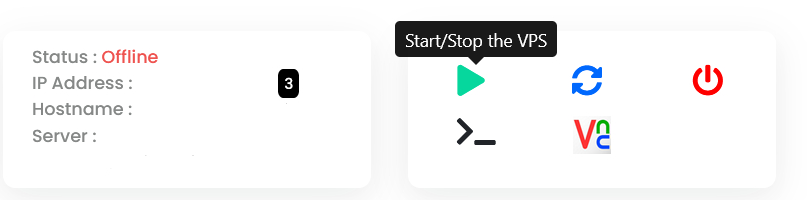
- Once the VPS has shutdown, click the "PLAY" icon to restart it, as shown below:
- When the VPS has booted, your installation will begin.
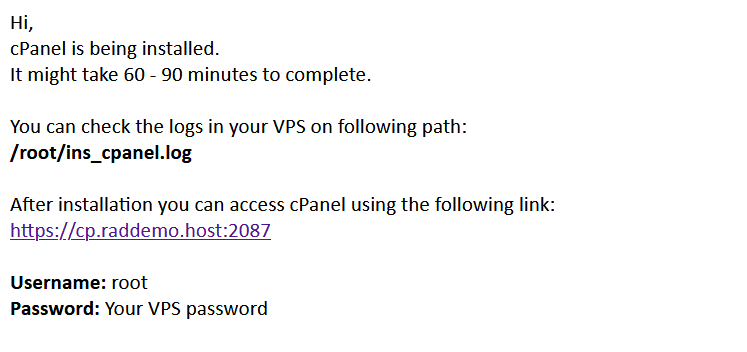
- An email with the control panel installation details will be sent.
- You may now navigate to the InterWorx login screen in your browser to configure the InterWorx settings.


The above guide assumes that a valid InterWorx license has been generated for your server's IP address.