 👀 Choose SSD-powered VPS servers for increased speed, power, and security! Now 50% off- starting from only $3.19/mo.
This article provides a guide demonstrating how to create a database in cPanel. This guide applies to users of cPanel Hosting, WordPress Hosting, and Reseller Hosting.
How to Create a Database in cPanel
To create a database in cPanel, follow the steps outlined below:
- Log in to cPanel
- Go to your cPanel login URL.
- Enter your username and password.
- Find the Databases section
- On the cPanel home screen, look for Databases.
- Click Manage My Databases.

- Create a new database
- Under Create New Database, enter a database name.
- Example:
mywebsite_db - Click Create Database.

- Go back to the MySQL Databases page
- After cPanel confirms the database was created, click Go Back.
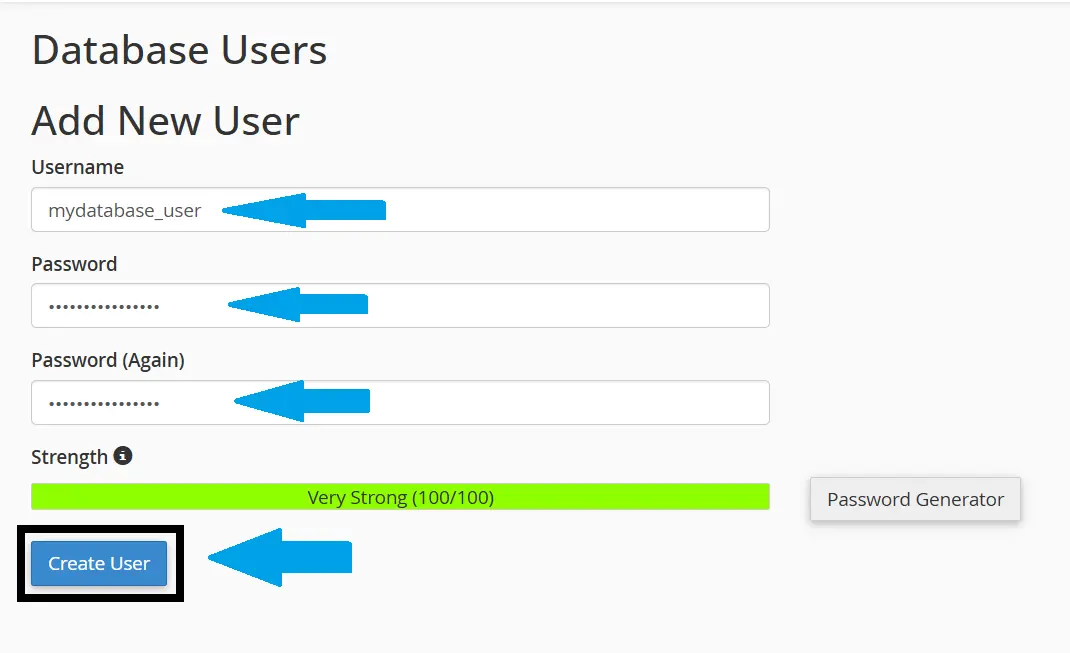
- Create a database user
- Scroll to MySQL Users.
- Under Add New User, enter a username.
- Create a strong password or use the Password Generator.
- Click Create User.
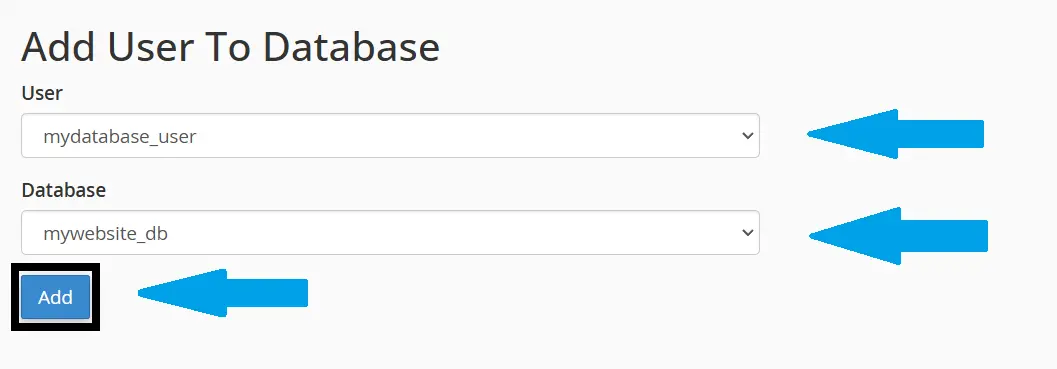
- Add the user to the database
- Scroll to Add User To Database.
- Select the user you just created.
- Select the database you just created.
- Click Add.
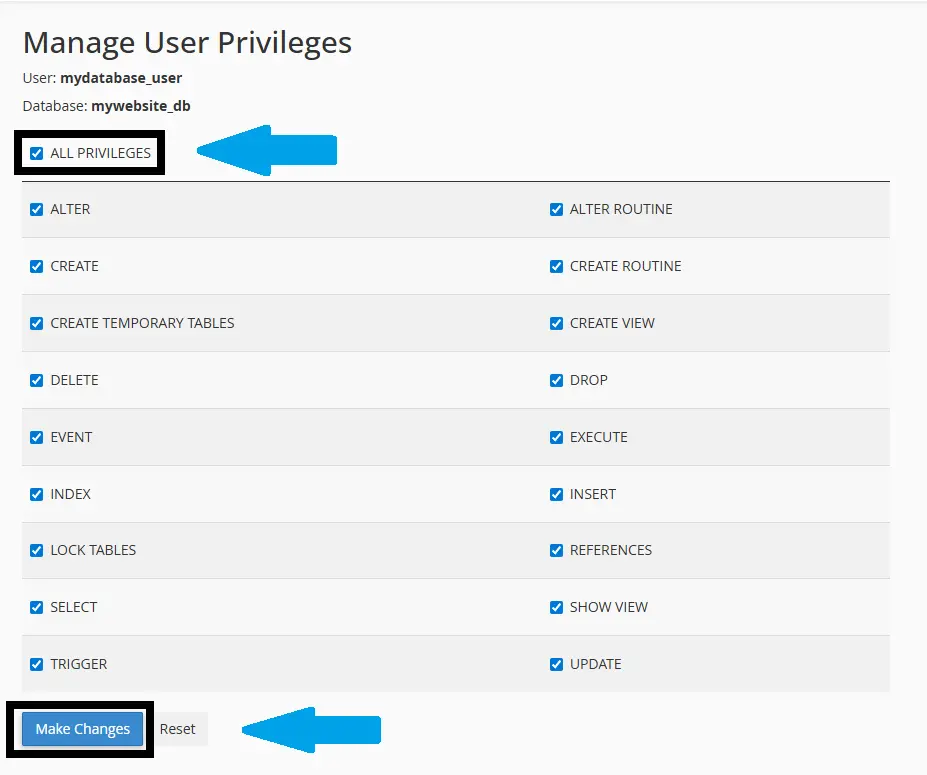
- Assign user privileges
- Select the permissions the user should have.
- For most website applications, choose All Privileges.
- Click Make Changes.
- Confirm the database details
-
You now have:
- Database name
- Database username
- Database password
- Database host, usually
localhost
-
- Use the database in your application
- When installing WordPress, WHMCS, Joomla, or another app, enter the database details when prompted.
Example:
Database Name: cpaneluser_mywebsite_db
Database User: cpaneluser_dbuser
Password: YourStrongPassword
Database Host: localhost
Note: cPanel may prefix database names and usernames with your cPanel account username.


Conclusion
You now know how to create a database in cPanel.
