This article provides a guide for how to setup Node.js application in cPanel shared hosting account.
Setting up a Node.js application in cPanel involves several steps, including creating the application, configuring the environment, and managing the app's processes. Here’s a step-by-step guide:
1. Log in to cPanel
Log in to your cPanel account using your credentials.
2. Access the Setup Node.js App
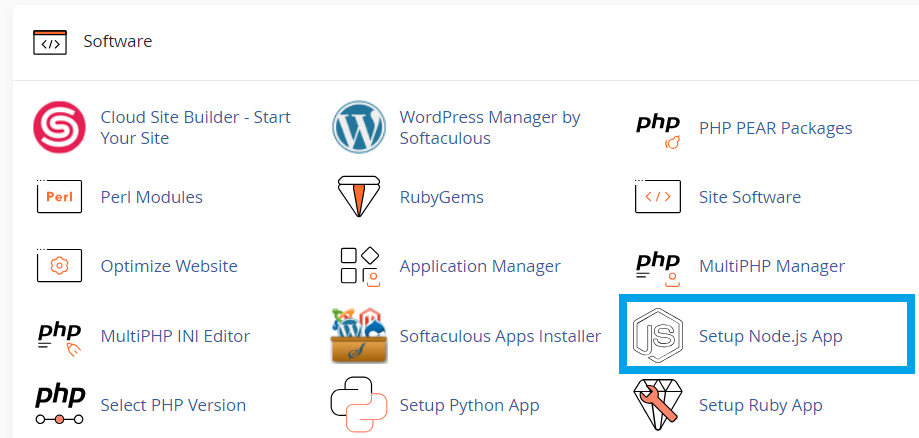
- In cPanel, scroll down to the Software section.
- Click on Setup Node.js App.

3. Create a New Application
-
Create Application:
- Click on Create Application.
- Select the Node.js version you want to use from the Node.js Version dropdown.
- Set the Application Mode to either "Production" or "Development" depending on your needs.
- Specify the Application Root (the directory where your application’s files will be stored).
- Set the Application URL (the URL at which your application will be accessible).
- Define the Application Startup File (usually
app.jsorserver.js).
-
Create the Application:
- Click Create.
4. Deploy Your Application Files
-
You can upload your application files to the directory specified in the Application Root using the File Manager or FTP.
-
Ensure that your application’s dependencies are installed:
- Access the terminal via cPanel’s Terminal feature.
- Navigate to your application’s directory:
cd path/to/application/root. - Run
npm installto install all required dependencies listed in yourpackage.jsonfile.
5. Run the Application
- Go back to Setup Node.js App.
- Click on the Run NPM Install button to install dependencies.
- Click Restart to start the Node.js application.
6. Check the Application Status
You can monitor your application's status and logs from the Setup Node.js App interface. If the application doesn’t start, check the logs for any errors and troubleshoot accordingly.
7. Manage Application
- Environment Variables: You can set environment variables in the Setup Node.js App interface if needed.
- Restart or Stop: You can stop or restart your application from the same interface.
8. Access Your Application
Once everything is set up, you can access your application via the URL you specified.
Additional Tips:
- Security Considerations: Make sure your application is secured, especially if it’s a production environment.
- Monitoring: Set up monitoring for your Node.js application to track its performance and uptime.
This process should get your Node.js application up and running in a cPanel environment.
 👀 Choose SSD-powered VPS servers for increased speed, power, and security! Now 50% off- starting from only $1.99/mo.


