 👀 Choose SSD-powered VPS servers for increased speed, power, and security! Now 50% off- starting from only $3.19/mo.
This article provides a guide for how to enable and run the Rad Cloud Server Import WHMCS addon module.
What is Rad Cloud Server Import Addon Module?
As of v2.0.0, or later, of WHMCS VPS Reseller module, an addon module, 'Rad Cloud Server Import' is bundled with the 'Rad_cloud' server module. The 'Rad Cloud Server Import' addon enables possibility to import pre-configured Cloud VPS products with 'Rad_cloud' server integrations.

Features of Rad Cloud Server Import Addon:
- 1-click creation of ready-to-sell Cloud VPS products
- Setup imported products options (Product Group, Welcome Email Template, Import Level)
- Automatic configuration of all required 'Rad_cloud' server options
- From installation to VPS selling in under 3 minutes
Rad Cloud Server Import Addon Prerequisites
This guide assumes the following system and environment requirements are met:
- Rad Cloud API Account
- Rad_cloud server module installed & connected
- Rad Cloud Server Import addon module installed
How to Enable Rad Cloud Server Import Addon Module for WHMCS
To enable Rad Cloud Server Import addon module for WHMCS, follow the steps:
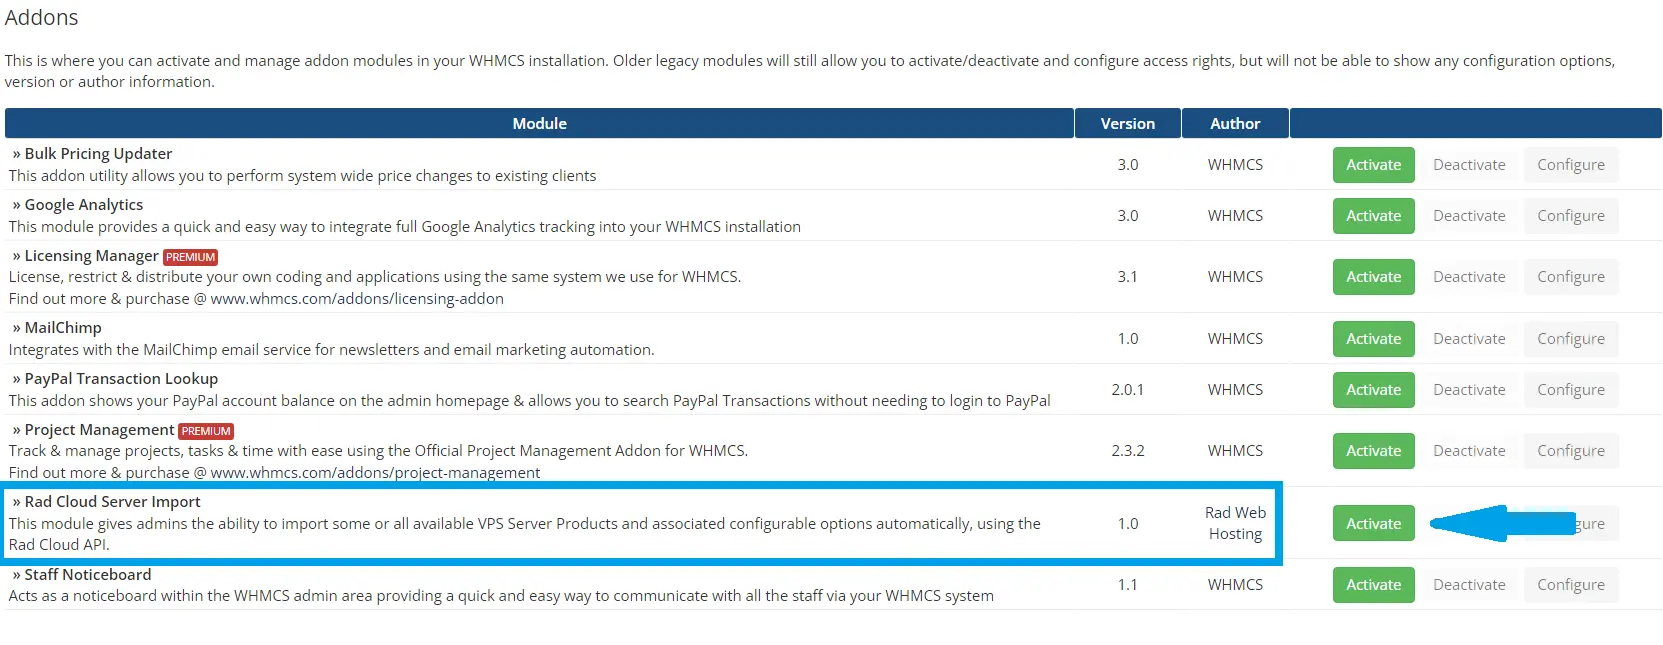
- Navigate to the Addon Modules settings interface (Access from '/whmcs/your_admin/configaddonmods.php', where "your_admin" is the WHMCS admin directory).
- Click the "Activate" button corresponding with the "Rad Cloud Server Import" module:
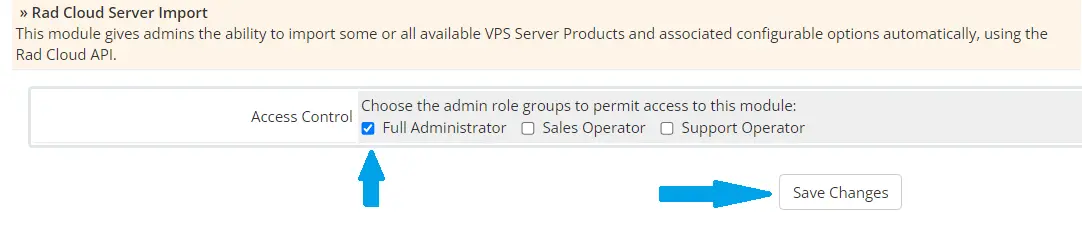
- Click "Configure" to configure the module access group.
- Choose "Full Administrator" and click "Save Changes" to enable the settings:
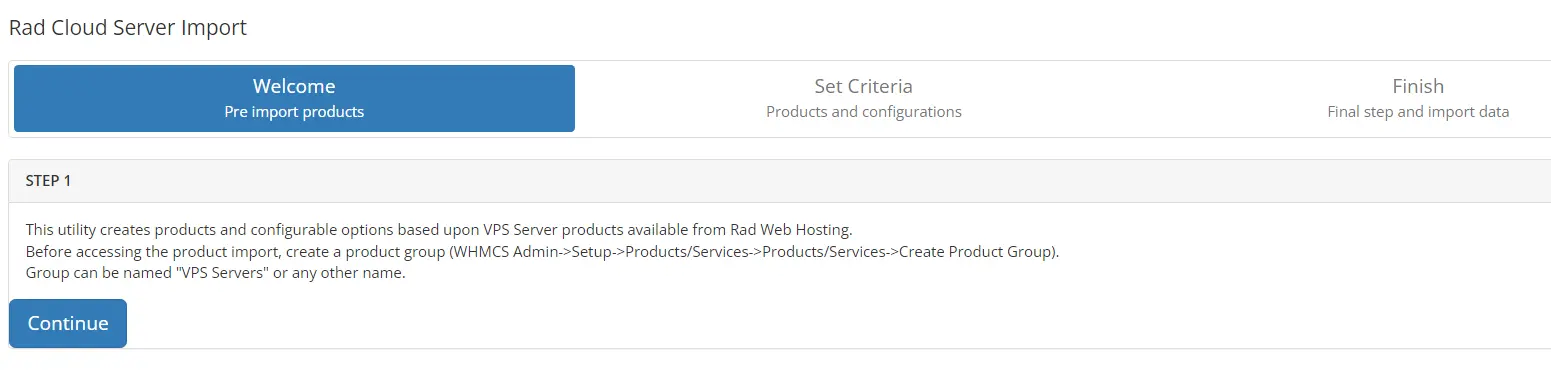
- Navigate to 'Rad Cloud Server Import' from the Addons dropdown menu:

- (STEP 1) From the Rad Cloud Server Import Manager, click "Continue" to initiate Rad Cloud Server Import process:
- (STEP 2) Configure the Import Settings according to your preferences:
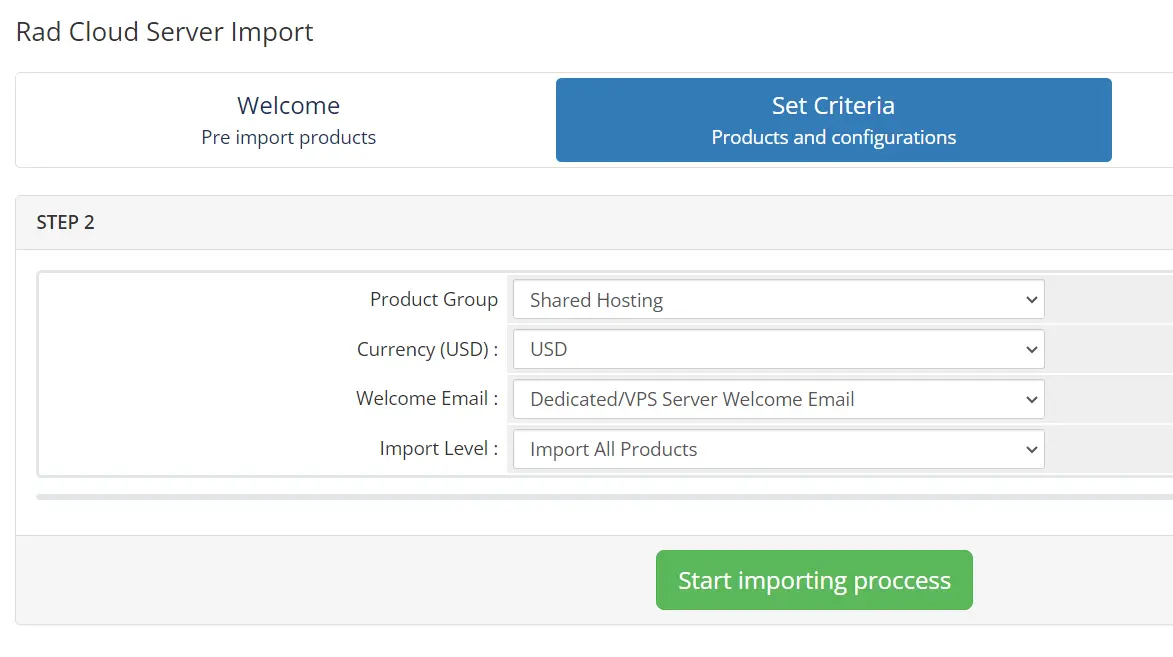
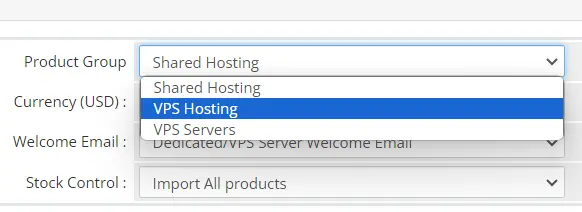
- (STEP 2) Configure the Product Group imported products should be assigned to:
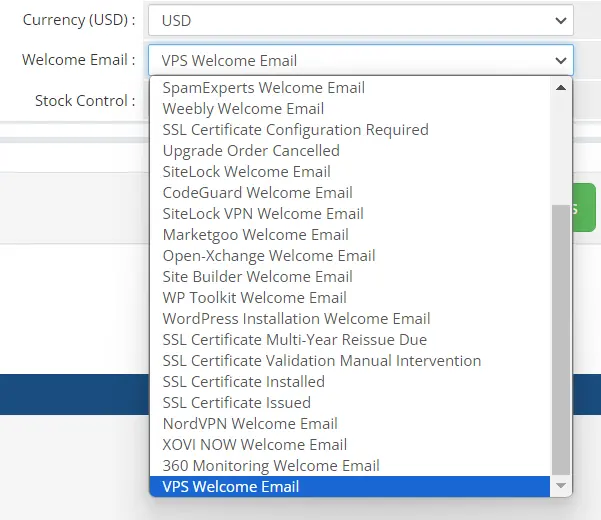
- (STEP 2) Configure the Welcome Email template imported products should use:
- (STEP 2) Select "Import Level" value ('Lite Import' recommended for new installs)
- (STEP 2) Once all options set, click "Start Importing Process" button to initiate import
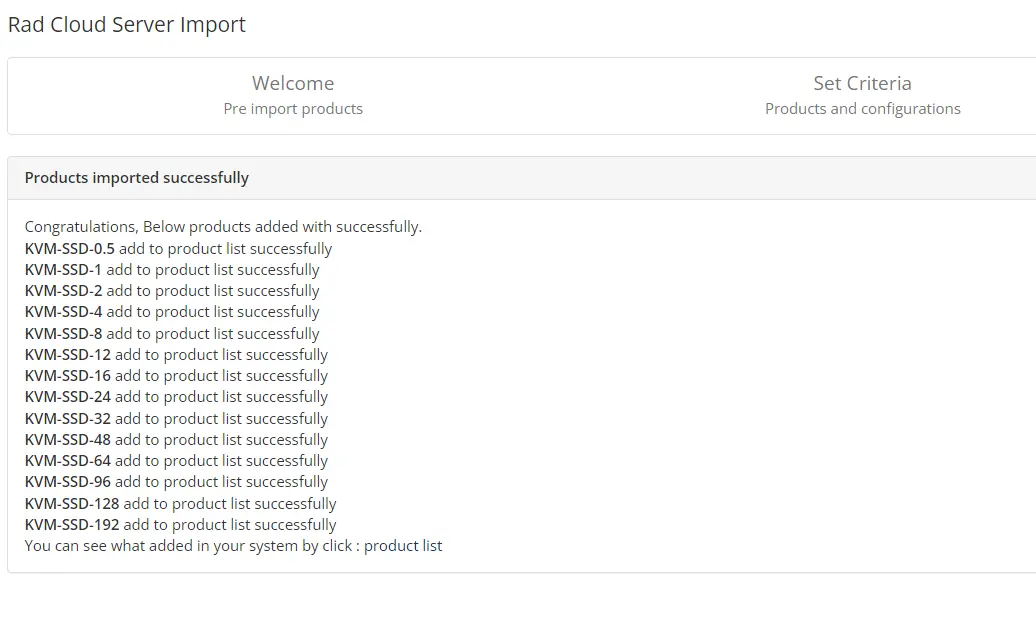
- (STEP 3) Receive confirmation of successfully imported products and list of products:
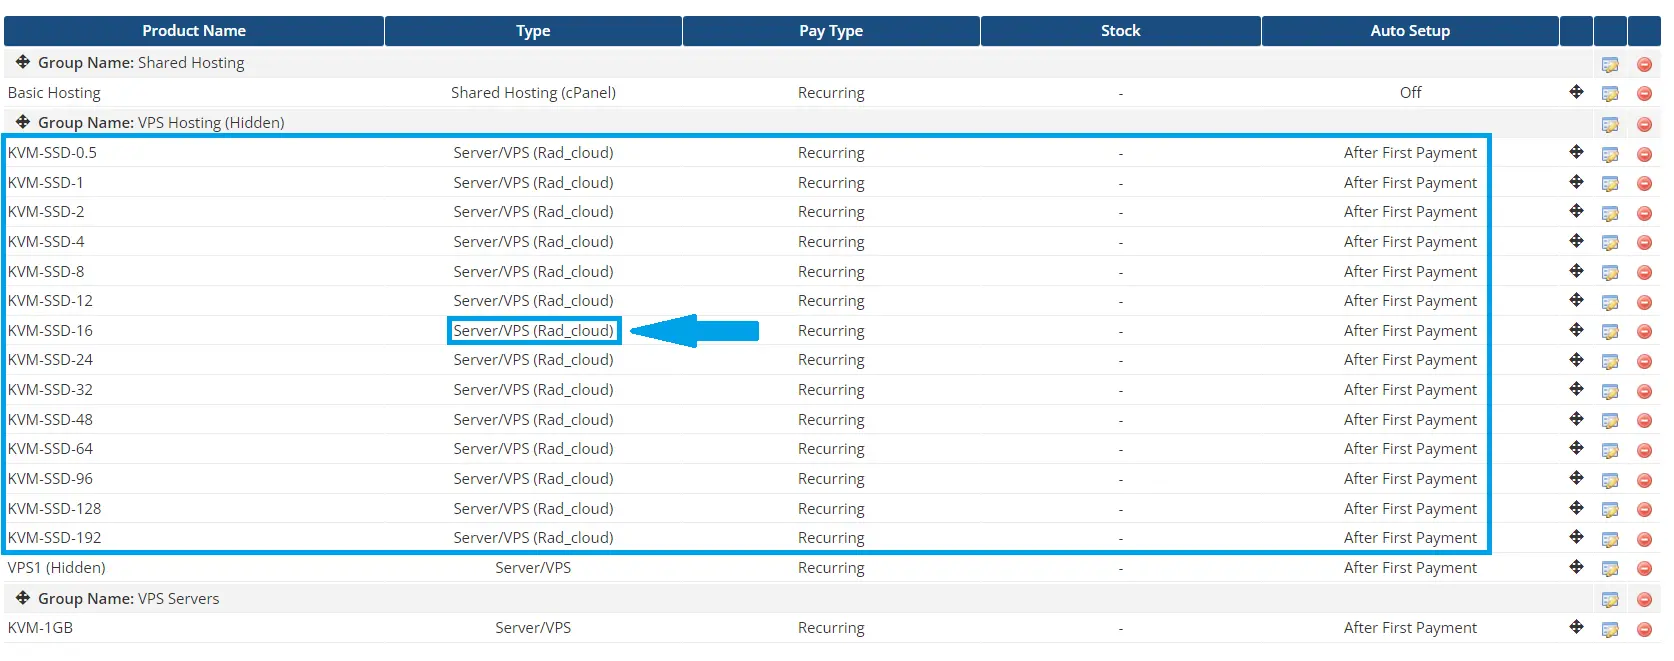
- Navigate to Products/Services settings page in WHMCS Admin for overview:


Conclusion
That's it. You have successfully enabled and run the Rad Cloud Server Import addon module.
