 👀 Choose SSD-powered VPS servers for increased speed, power, and security! Now 50% off- starting from only $3.19/mo.
NOTICE: THIS GUIDE IS DEPRECATED AND ONLY FOR HISTORIC REFERENCE.
This article provides a guide for installing the Dedicated Server Reseller WHMCS module.
Install WHMCS Dedicated Server Module
- Download and extract the WHMCS integration [HERE].
- Copy the entire directory via FTP, SCP, etc. to `/<WHMCS_PATH>/modules/servers/synergycpreseller/
Get API Credentials
First, you will receive an email with a link to reset password of Synergy Panel.

After, setting your preferred logins, use them to login to SynergyCP
Access the drop-down menu and navigate to "API Keys".
Create a unique name for the integration

Create an API Key for the Integration, and copy the key.

Create Server in WHMCS Admin
- From WHMCS Admin > Setup > Products/Services > Servers
- Click "Add New Server". Follow directions
- Name: SynergyCP
- Hostname: The hostname of the SynergyCP API - this is usually "api.[synergycpdomain].[tld]"
- IP Address: This will be provided by the data center.
- Nameservers are not required for this module.
- Server Details
- Module: "Synergy Control Panel - Reseller" .
- Username: leave empty
- Password: leave empty
- Access Hash: API Key (created in the steps above).
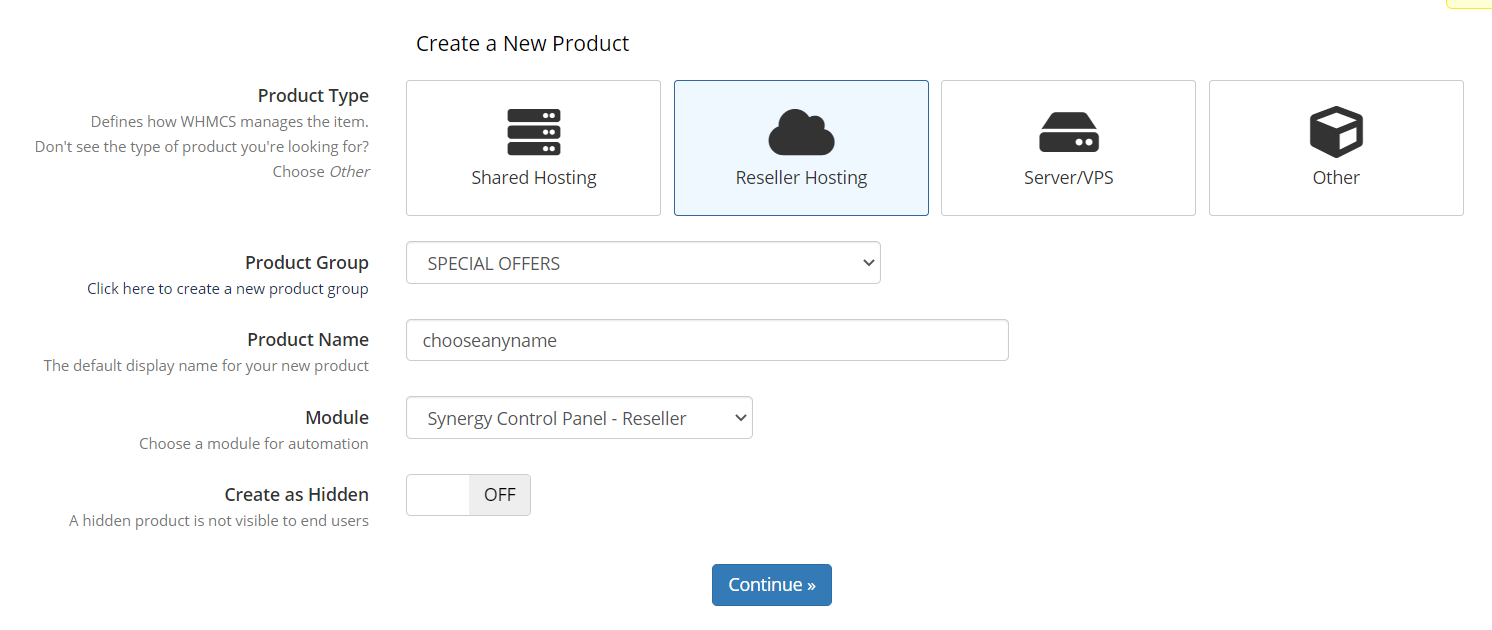
Create Product
- Navigate to Setup > Products/Services > Products/Services.
- Select "Create a new Product"
- Product Type: Reseller Account
- Product Group:
- Product Name:
- Go to "Module Settings" tab and enter the following details:
- Module: Synergy Control Panel - Reseller
- The remaining fields as described on that page.
- Go to "Custom Fields" and create new Custom Field with the following details:
- Field Name: SynergyCP Server ID (exactly as written)
- Field Type: Text Box
- Description: The ID of the server from SynergyCP. Found in the "Manage Server" page URL.
- Validation: [0-9]
- Check Admin Only and Required tick boxes.
Create Test Order
- Create a test order using the newly created Product/Service and a test client.
- Copy the "Server ID" over to the SynergyCP Server ID custom field in WHMCS. - Note: This step is required in order to link it to your server in SynergyCP.
- Copy the "Server ID" over to the SynergyCP Server ID custom field in WHMCS. - Note: This step is required in order to link it to your server in SynergyCP.
- Login as the client, view the service, and check that the buttons are working as expected. Bandwidth data takes up to 24 hours to sync.


