 👀 Choose SSD-powered VPS servers for increased speed, power, and security! Now 50% off- starting from only $3.19/mo.
This article provides a guide for how to configure ISO for VPS installation.
Configure ISO for VPS Installation
Users can set an ISO using the configuration menu.
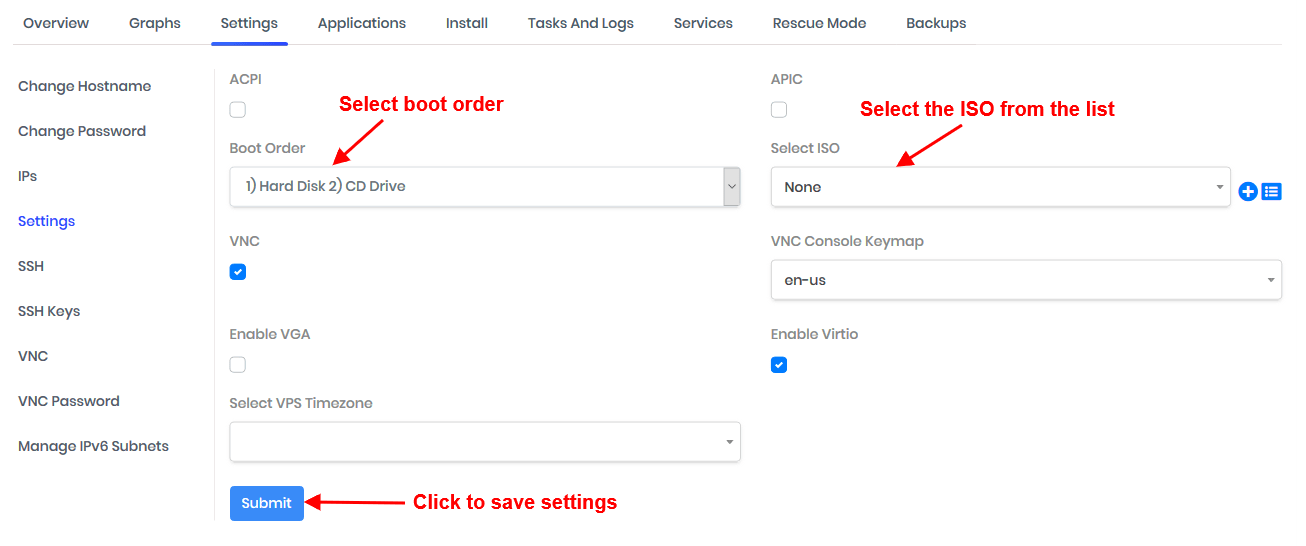
Follow the steps below to add an ISO to a VPS:
- Login to the VPS Panel.
- Navigate to the server you want to install ISO media to.
- Select "VPS Configuration" option from the "Settings" menu in the Server management interface.
- Select primary ISO and secondary ISO (if any) and select the boot order: 1) CDROM1 2) DISK1.
- Click "Submit" to save settings.
- Stop and start the VPS.
- Connect to the VNC console for the VPS.
- Follow the installation steps for your attached media.
- Ensure the installation is written to the disk.
- Navigate to the "VPS Configuration" option from the "Settings" menu in the Server management interface.
- Detach the .ISO media by selecting "None" for the primary and secondary ISO drop-down menus.
- Change the boot order: 1) DISK1 2) CDROM1.
- Click "Submit" to save settings.
- Reboot the server.
Conclusion
You now know how to configure ISO for VPS installation.
